Junkers Ju87G-2 STUKA Anti-Tank Attacker
(Hasegawa 1/48)
by Akio Hasegawa, M.D.
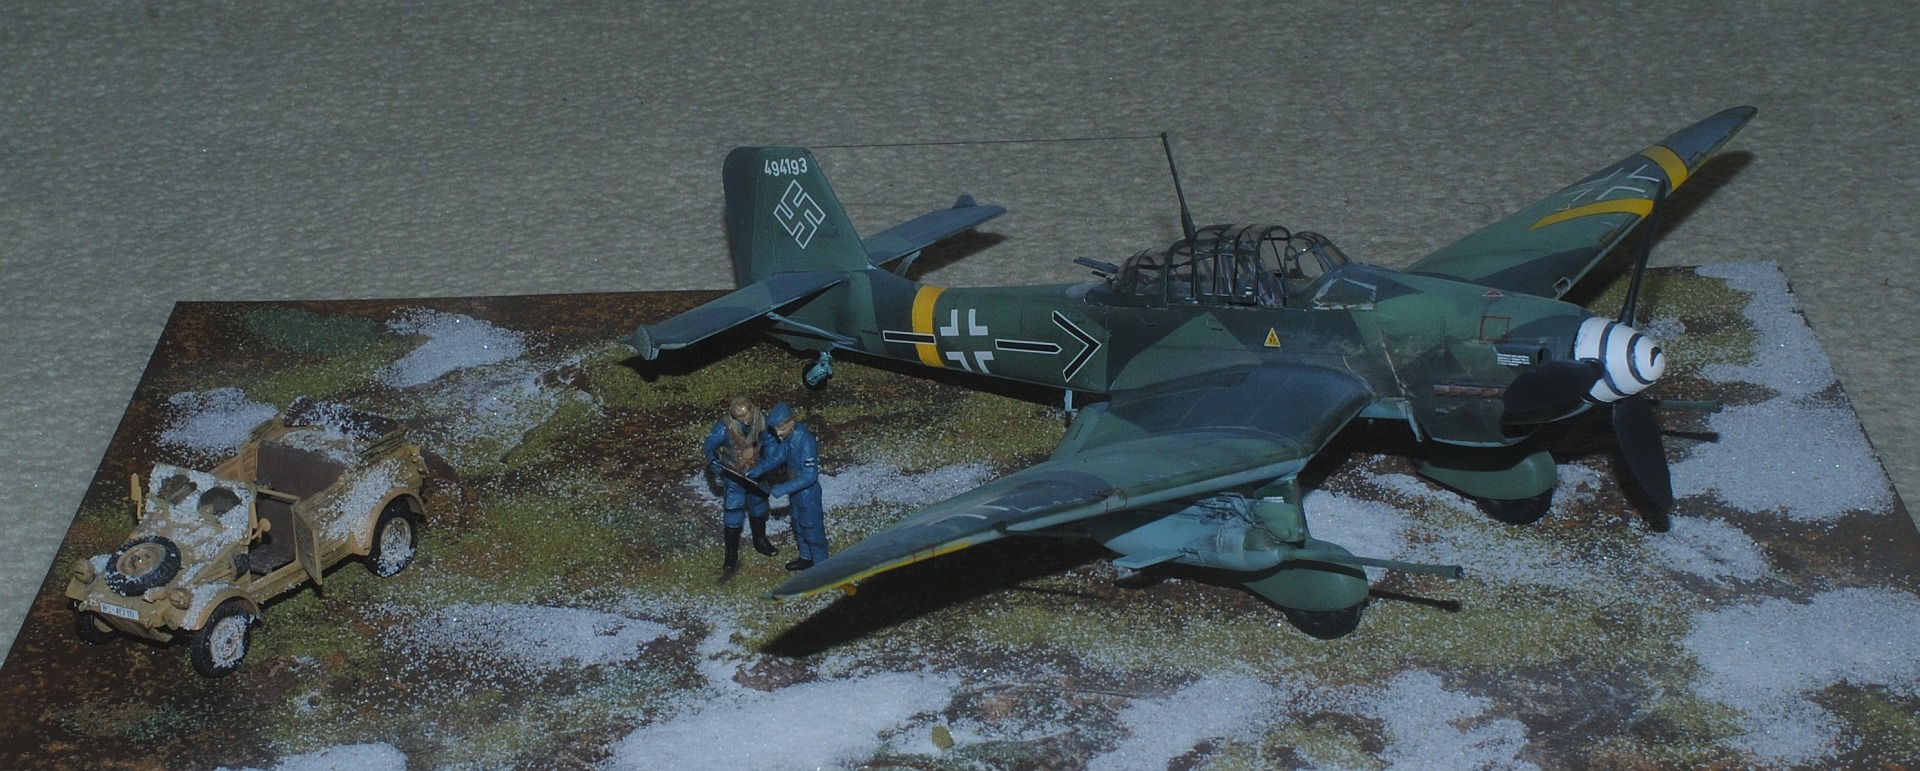
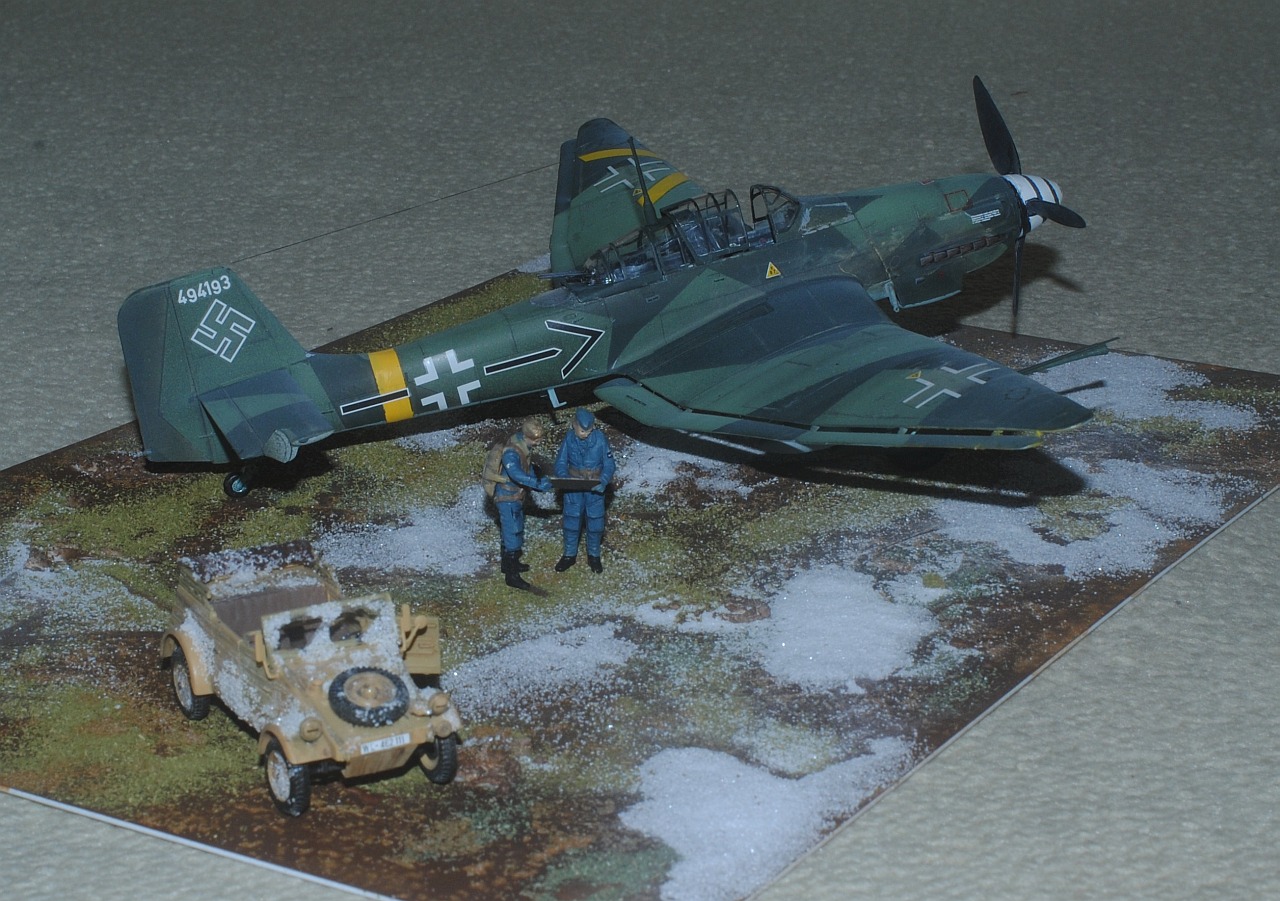
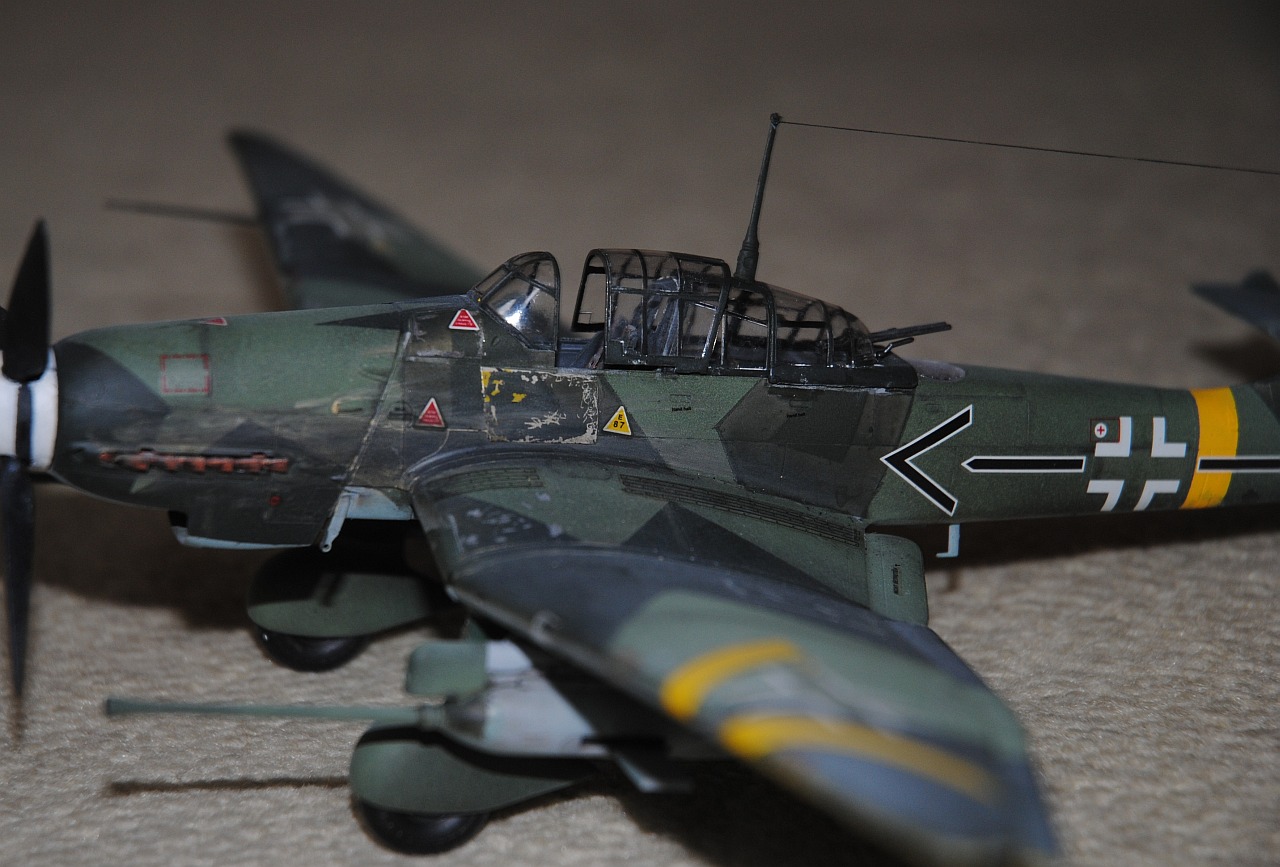
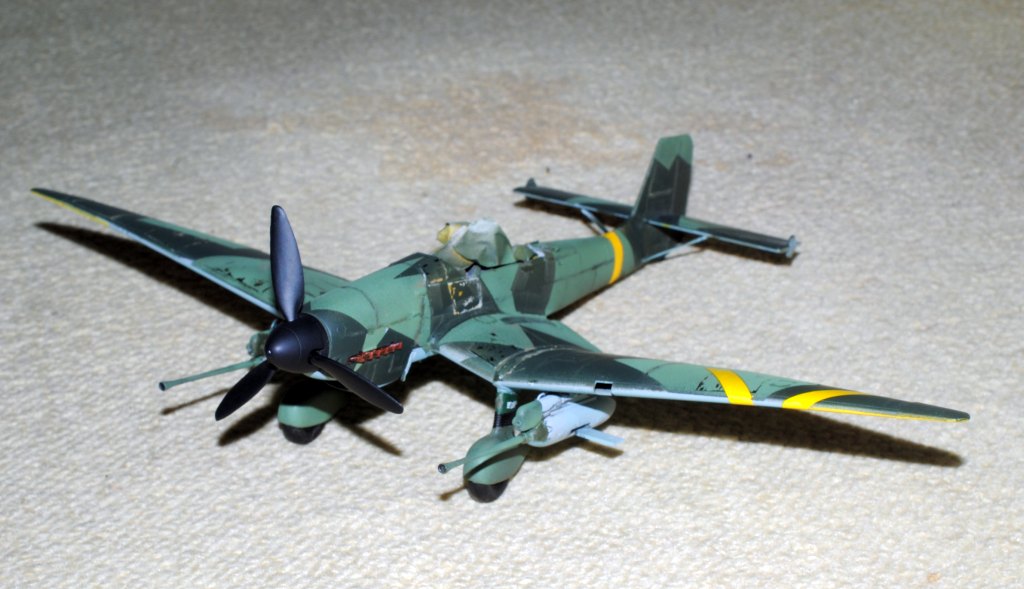
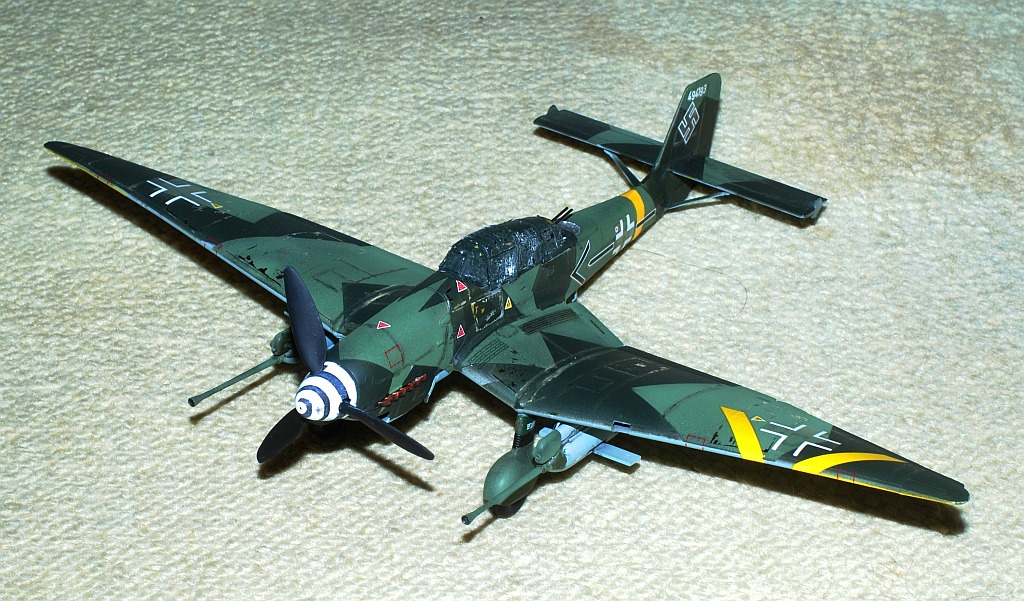
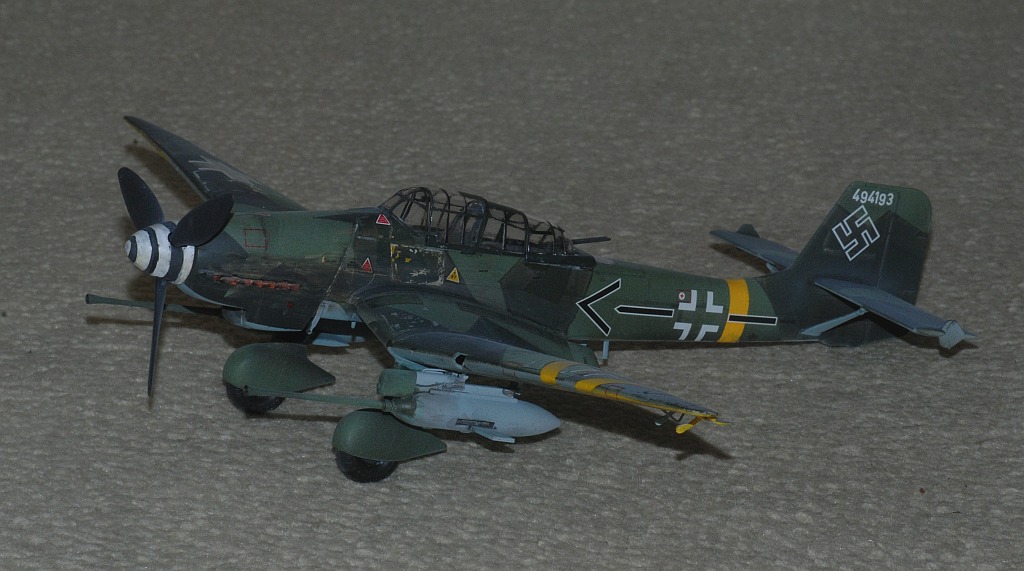
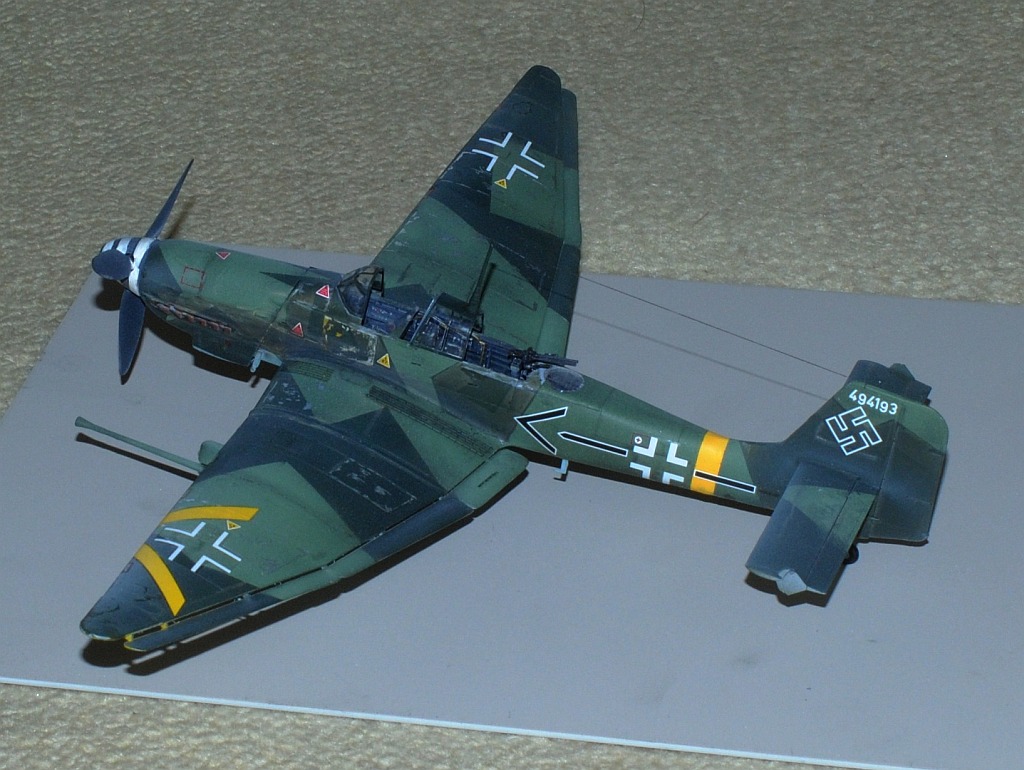
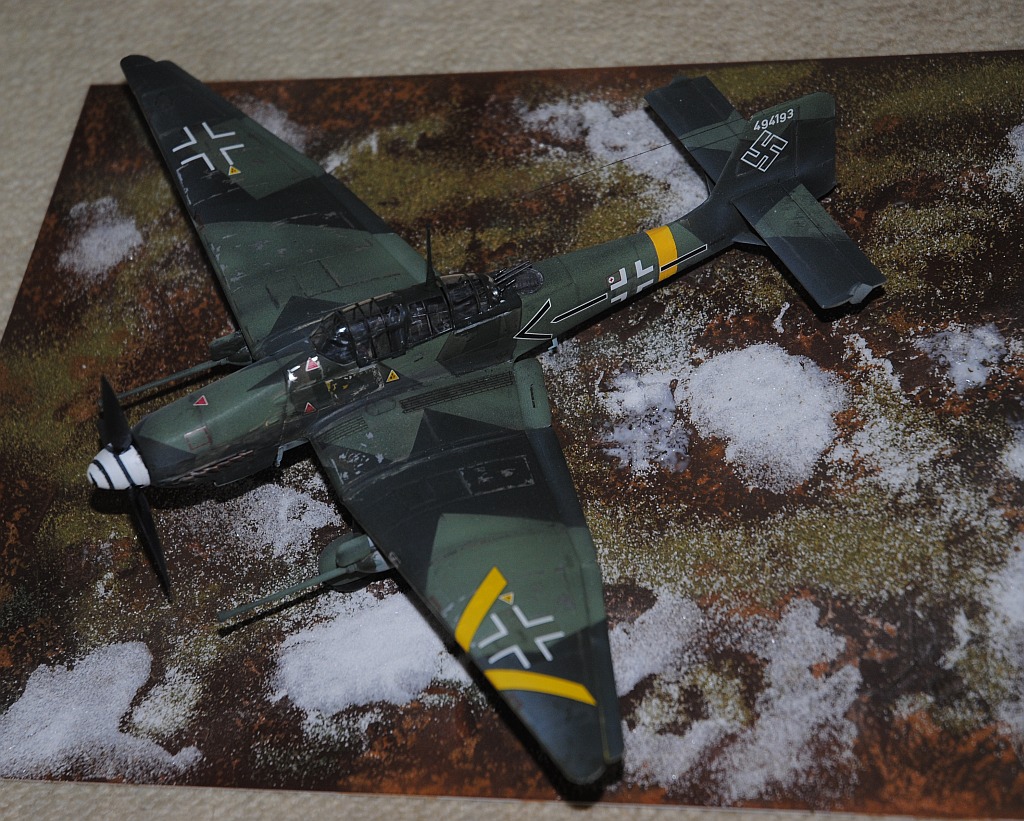
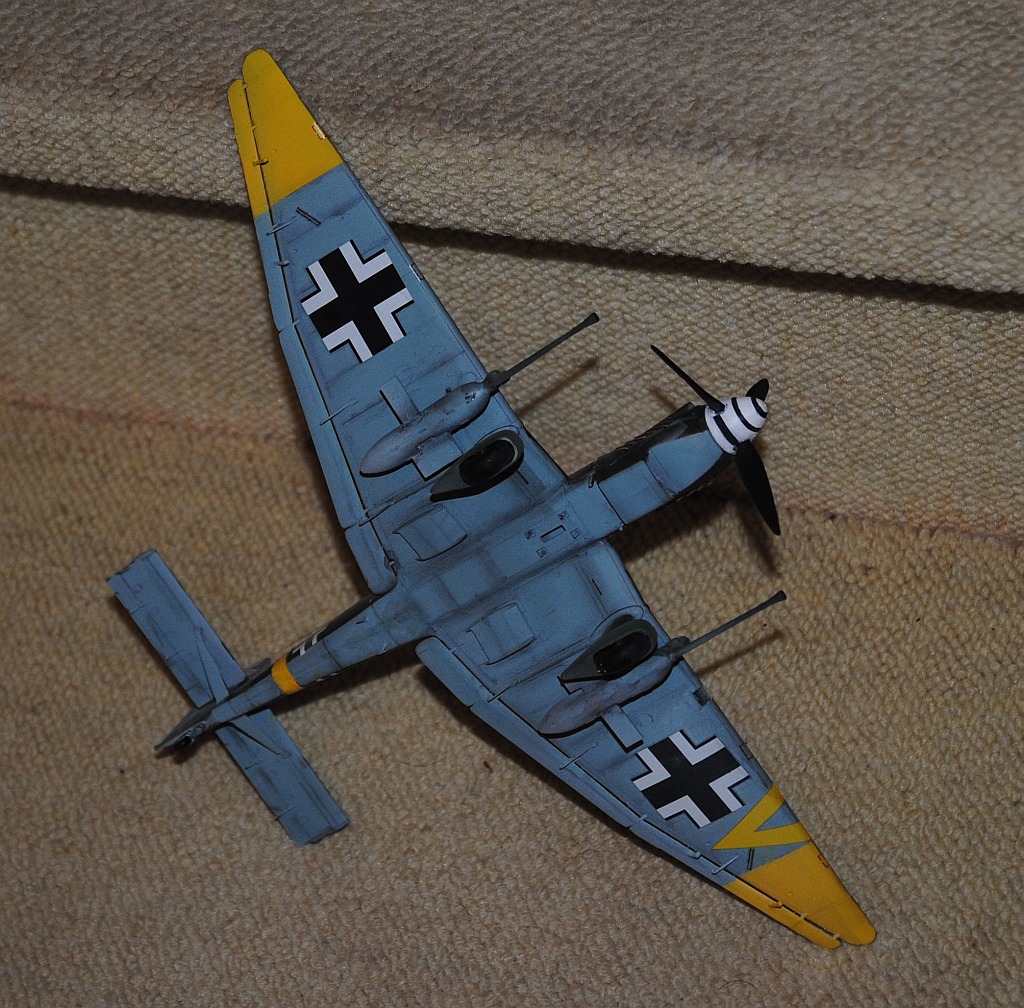
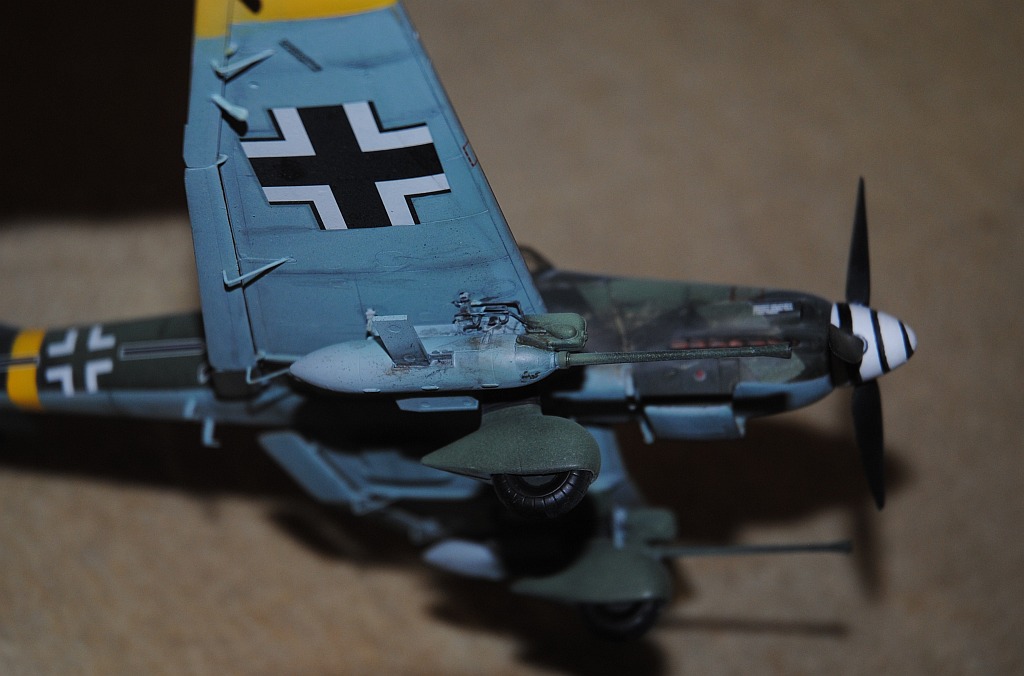
The kit is Hasegawa's 1/48 Junkers Ju87G-2 STUKA Anti-Tank Attacker, deployed in the eastern front. Mine is Oberst Hans Ulrich Rudel's Stuka in the environment with approaching winter with first snow.
(To view the images, click the underlined phrases, and to return to this page,
click RETURN key on the toolbar of your browser. All pictures here are shot by me, a seasoned-pathologist, with digital SLR Nikon D3000 Serial #2001042 with old Nikkor-S 35mm 1:2.8 Serial #380104, i.e., manual focus/manual exposure and AF-S Nikkor 18-70 mm ED)

(Crick for English description)
This site is licensed under a Creative Commons License.
(Crick for Japanese description)
Completed Images
Ju87G-2 (Crick to enlarge),
Ju87G-2 (Crick to enlarge),
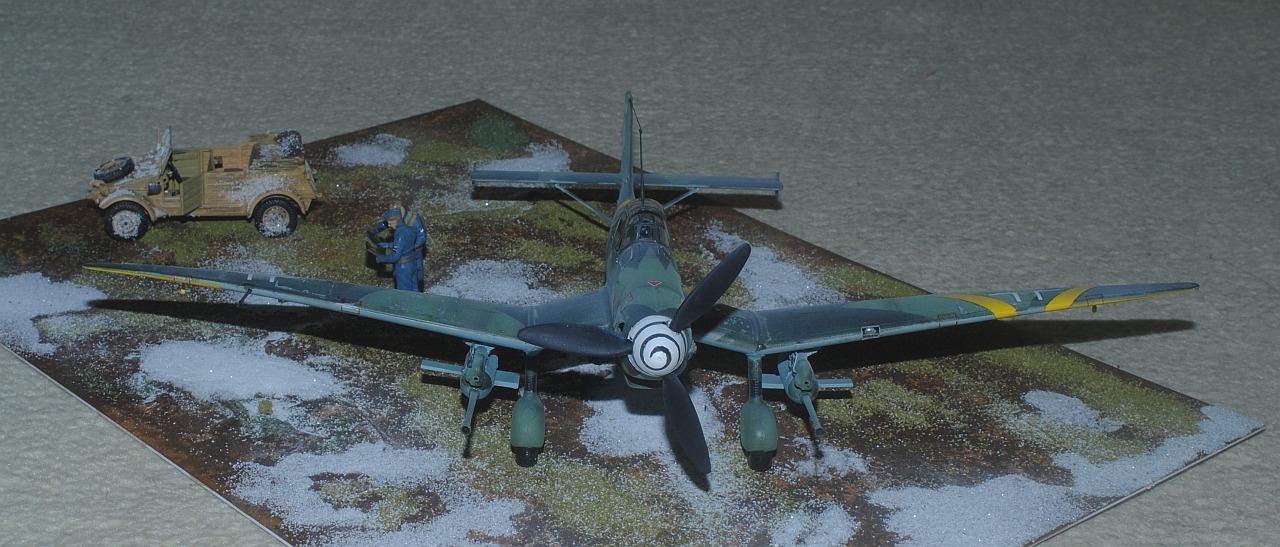
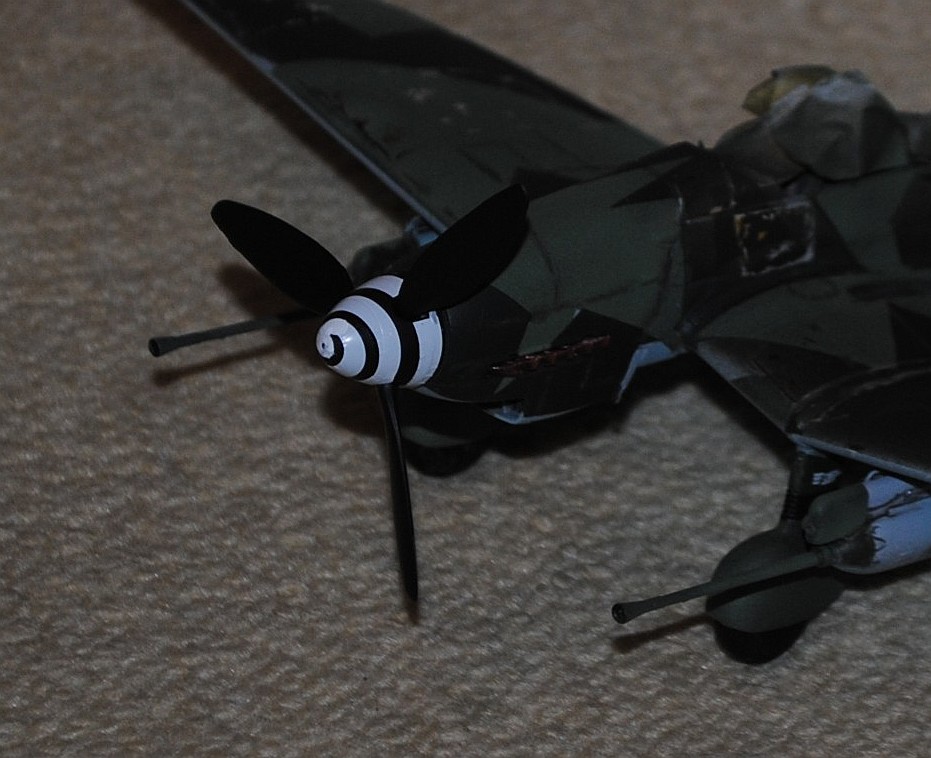
Ju87G-2 (anterior view) (Crick to enlarge),
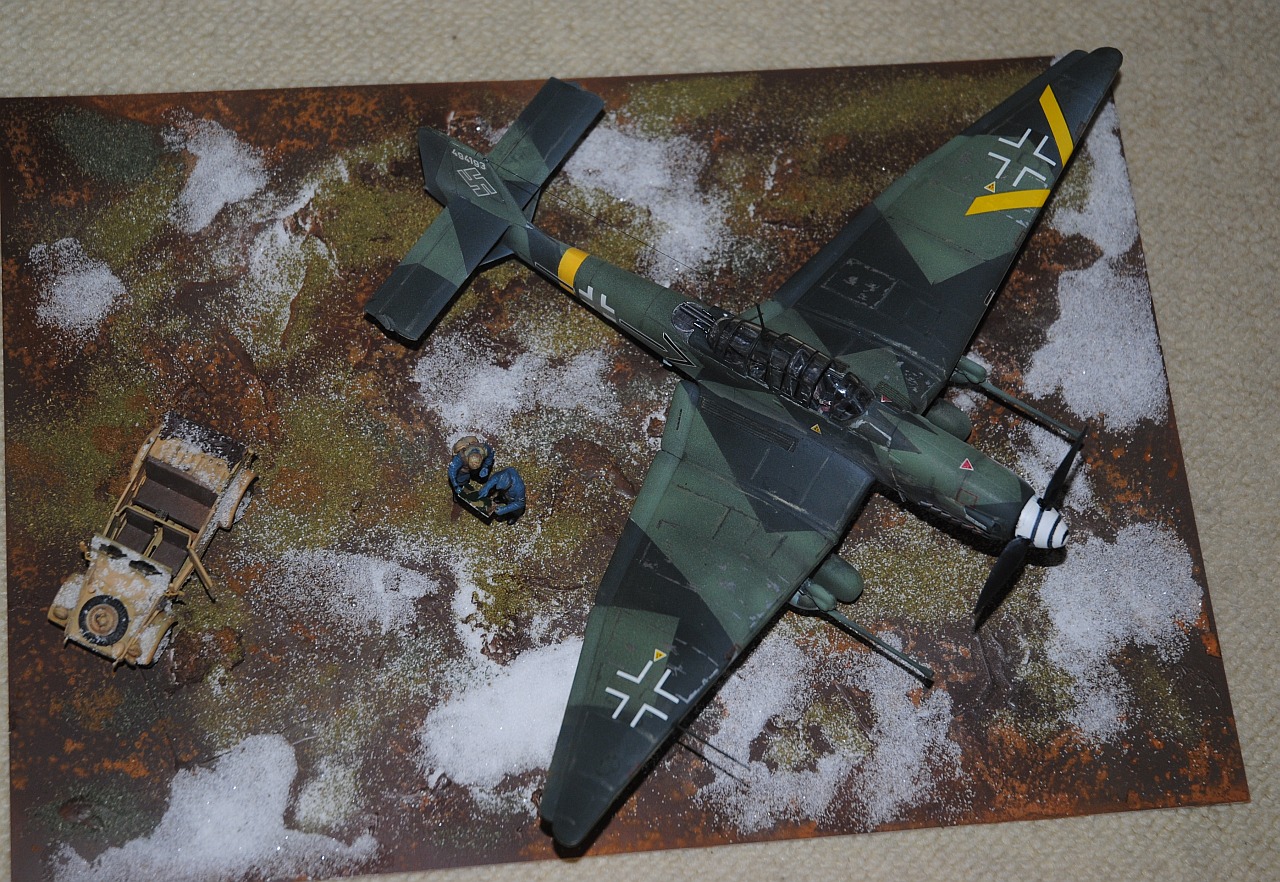
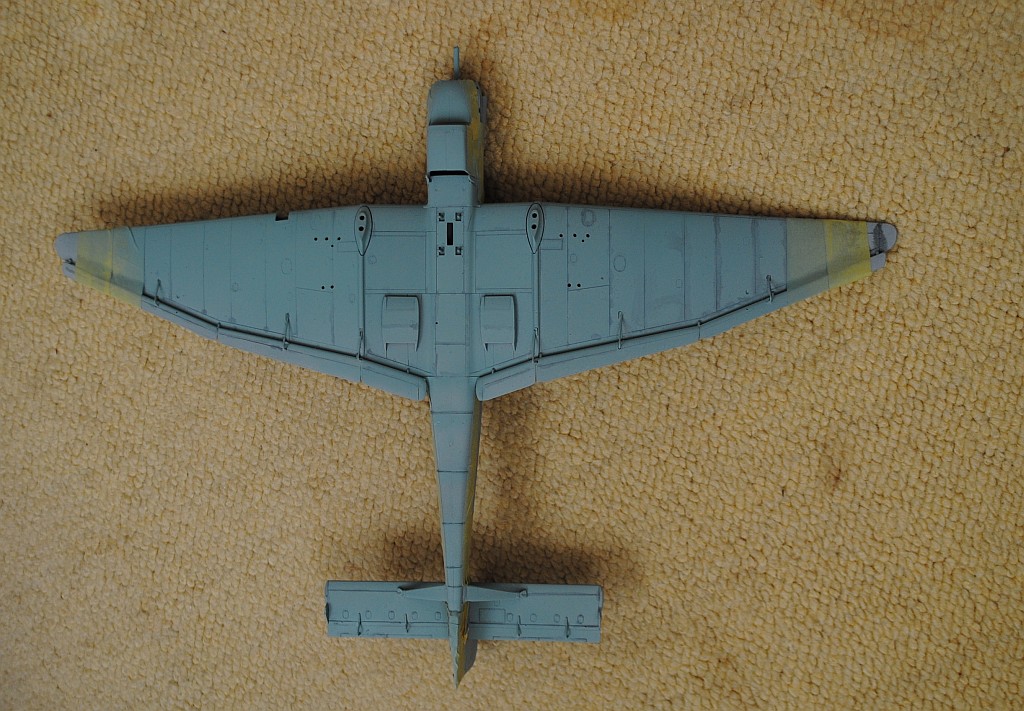
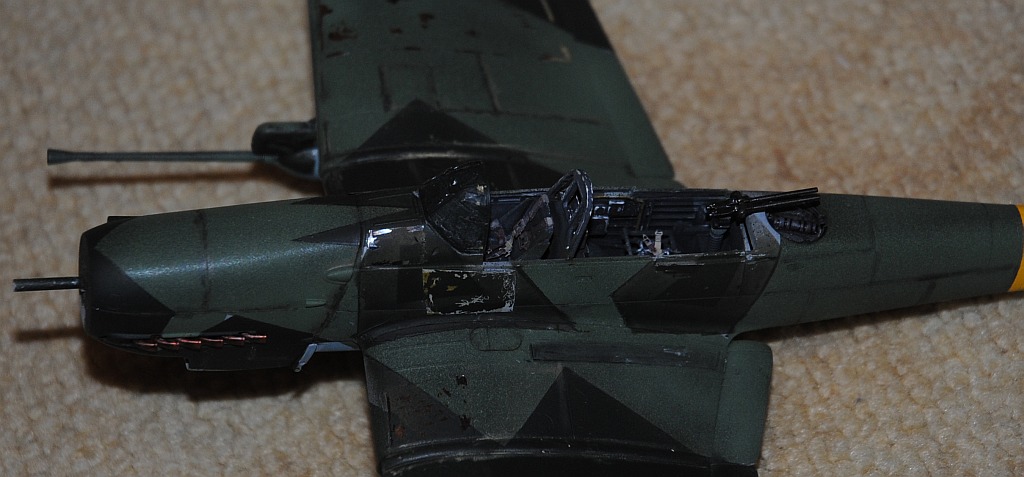
Ju87G-2 (upper view) (Crick to enlarge),

Ju87G-2 (underwing 37mm cannons enlarged) (Crick to enlarge),
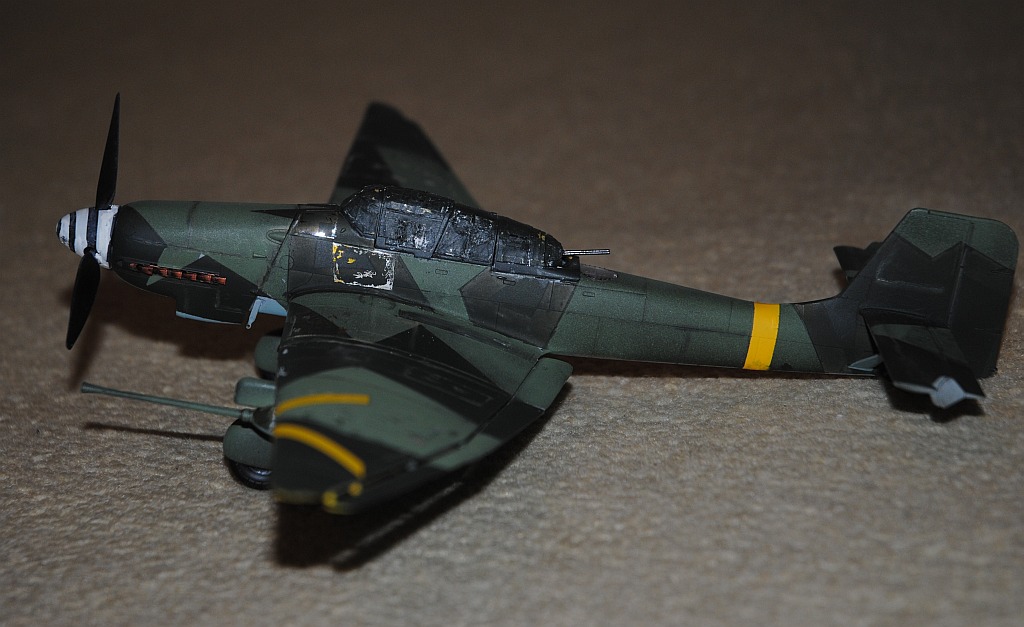
Ju87G-2 (Crick to enlarge),
Ju87G-2 (Crick to enlarge),
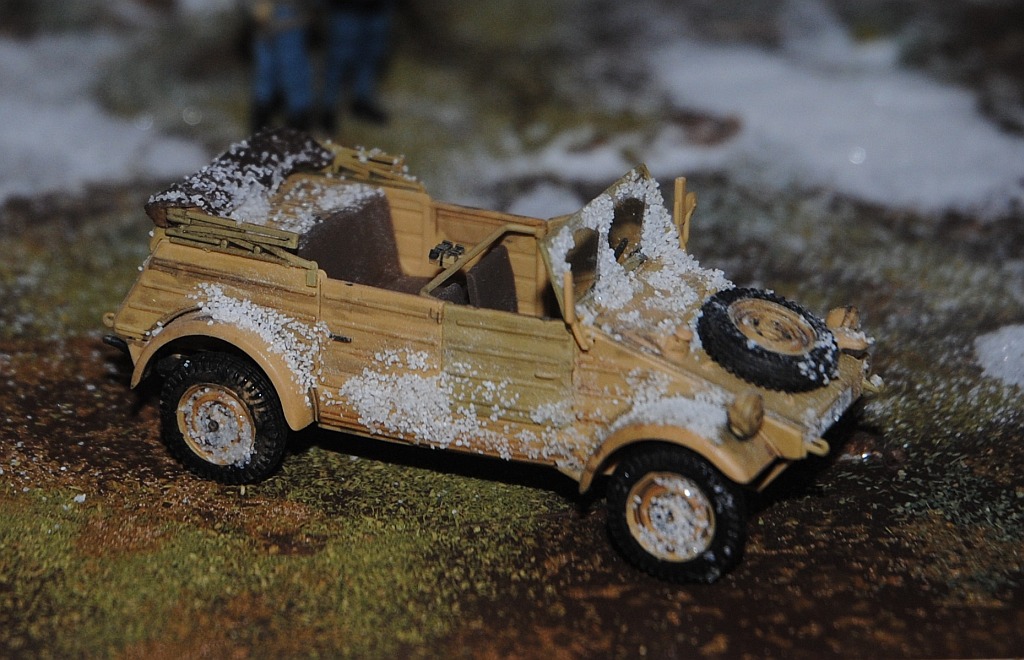
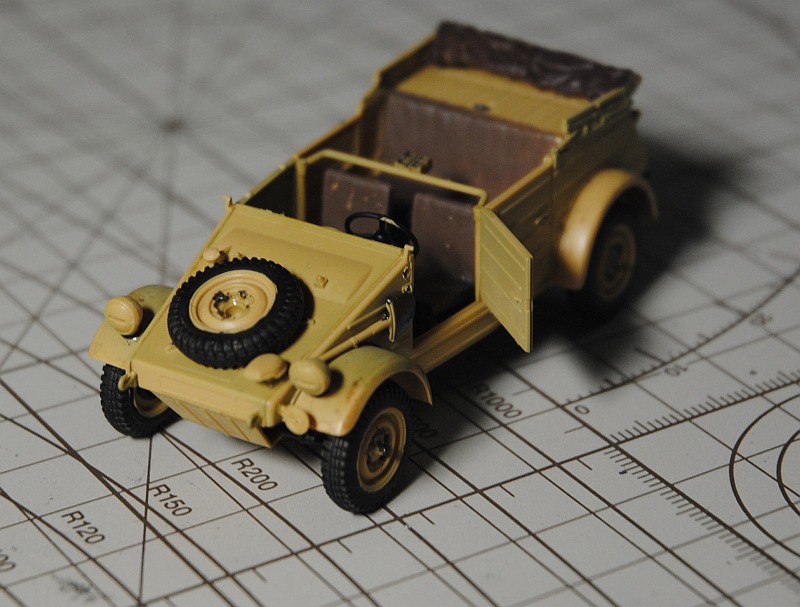
Kubelwagen type 82 (Tamiya 1/48) (Crick to enlarge),
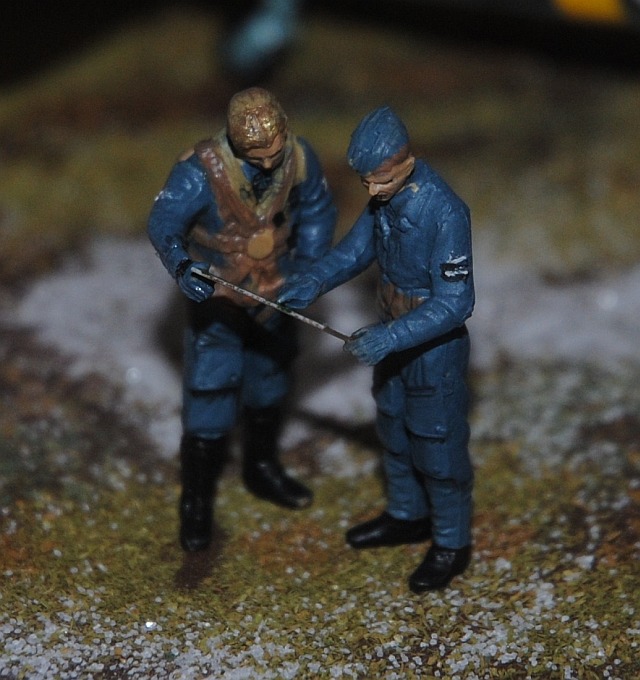
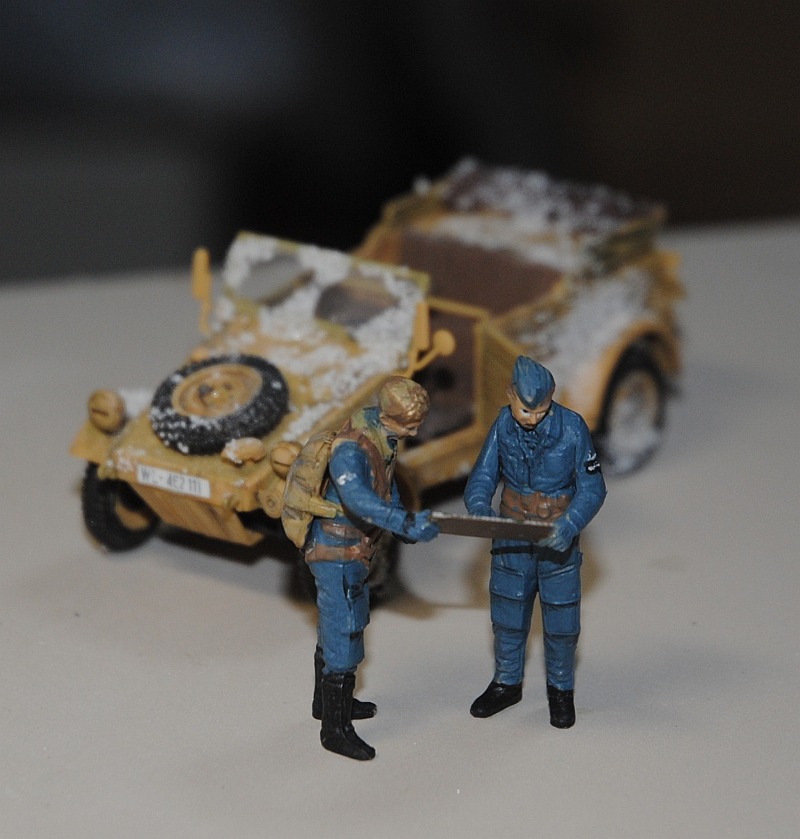
Crew confirming tactics - 1 (Crick to enlarge),
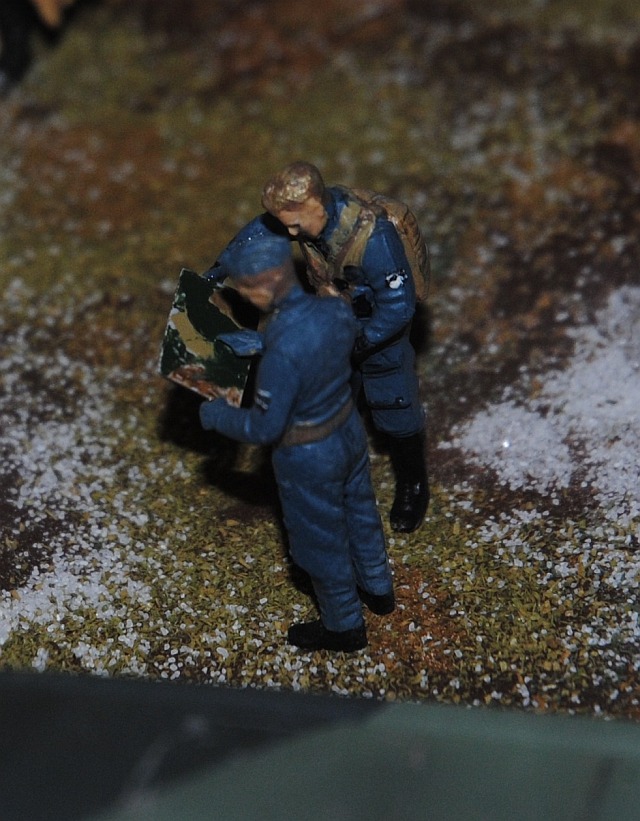
Crew confirming tactics - 2 (Crick to enlarge),
Chronology
2017.10.8. I start assembling the cockpit - Photo-1.
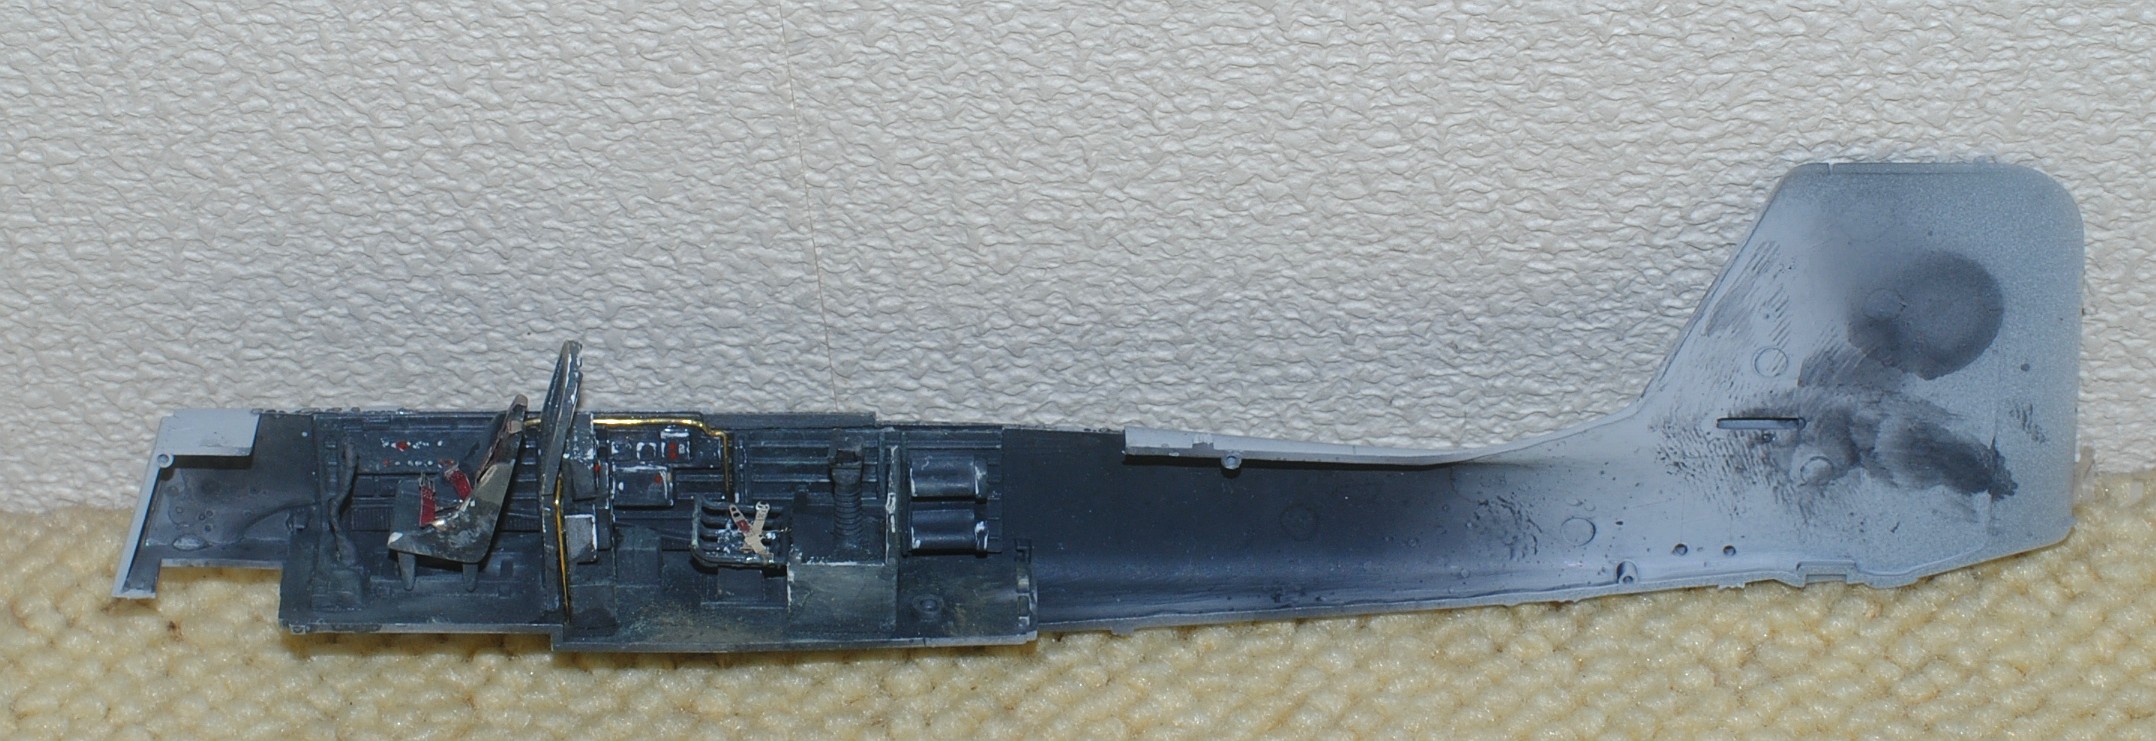
2017.10.29. Cockpit interior was sprayed with gray-black - Photo-1.
2017.12.3. Cockpit is almost completed, with add-on seat melts by Eduard, piping with 0.5mm brass wire -
Photo-1,
Photo-2,
Photo-3,
Photo-4.
This weekend's achievement
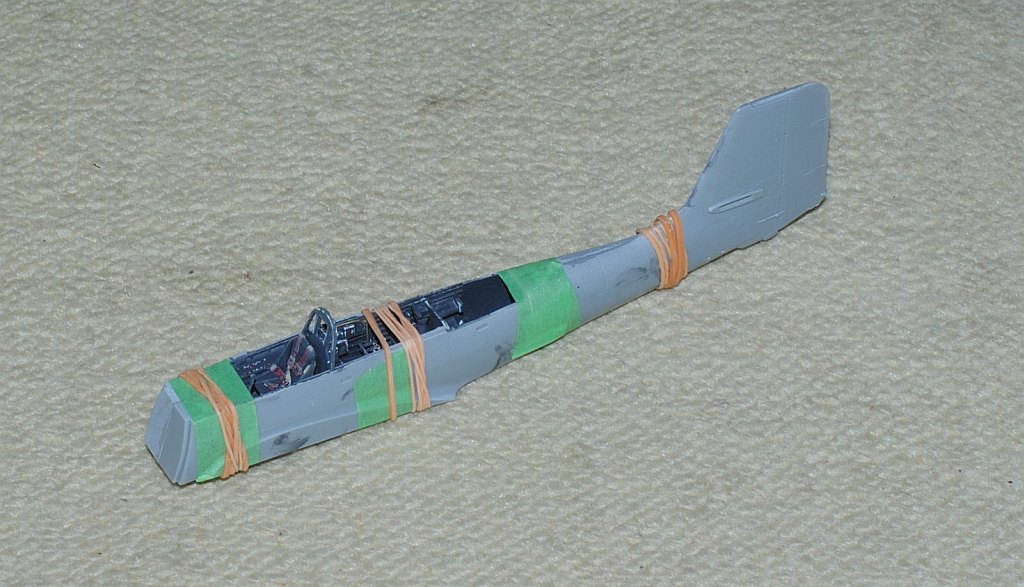
2017.12.24. After cockpit interior was finally sprayed with flat clear - Photo-1 and Photo-2, left and right half of the fuselage was cemented - Photo-3.
This weekend's achievement
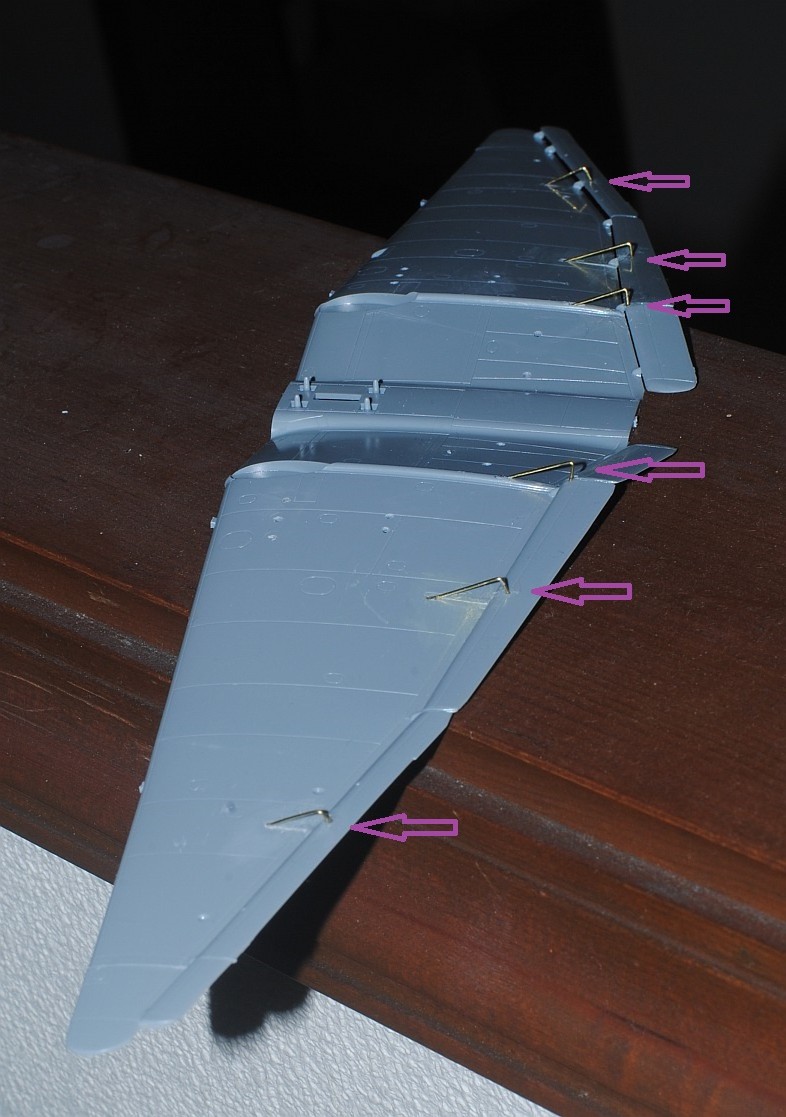
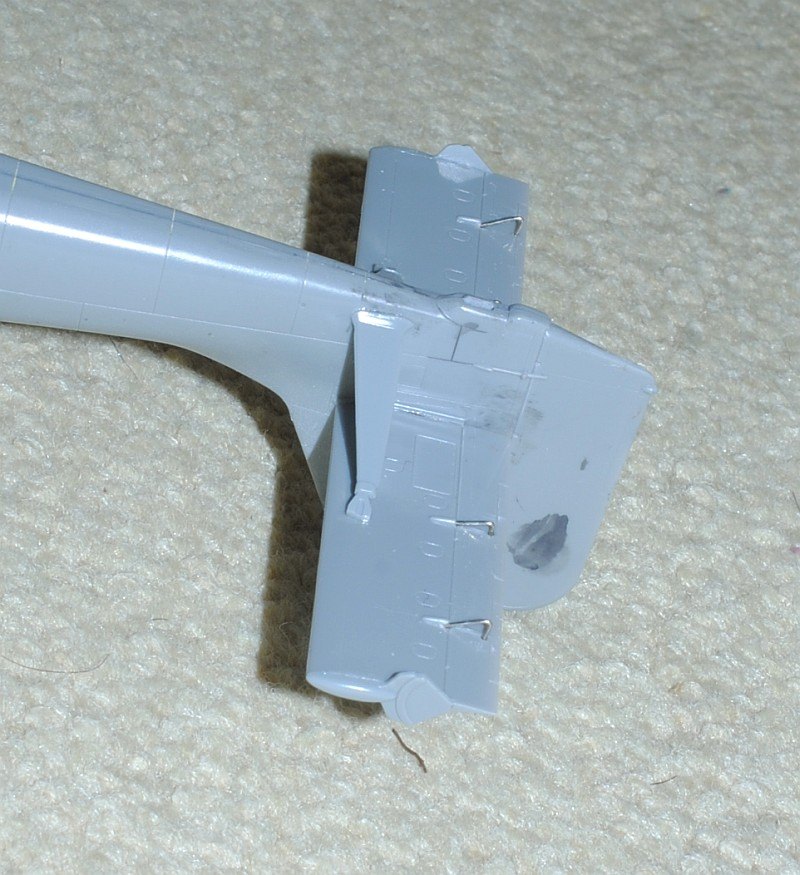
2018.1.8. Since aileron and flap actuator is not lifelike - Photo-1, I cut out the plastic parts, and implant actuators with 0.5mm brass wire - Photo-2. Main wing and horizontal tail plane is glued to the fuselage - Photo-3, Photo-4.
This weekend's achievement
2018.1.21. Actuator of elevator added. Images of the real plane from ref. 1 indicate actuators under the elevator - Photo-1, and Photo-2. Since this model has originally fake actuators (raised straight lines, indicated by light green arrows in Photo-3), I install them with 5mm brass and white metal wire (proximal one as a first step, indicated by red arrow) - Photo-3. Eventually, all four actuators are successfully installed - Photo-4, and Photo-5. Then, wheel spats are tentatively assembled - Photo-6.
This weekend's achievement
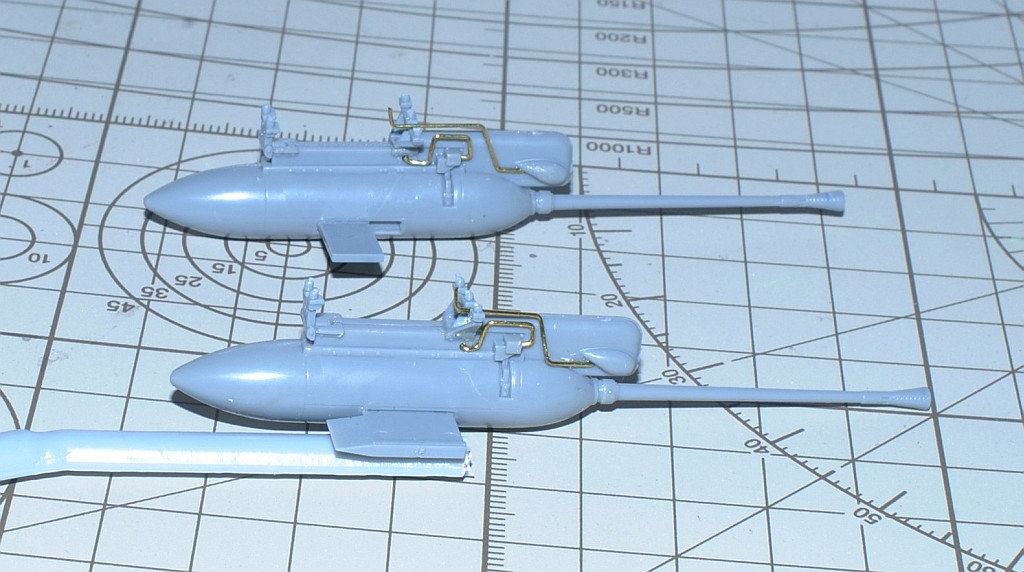
2018.1.28. The muzzle of the 37mm cannon on the sponson is pinholed with 05mm followed by 12mm drills - Photo-1, and Photo-2.
2018.2.12. Since reference image shows complex piping/wiring of the underwing 37mm cannons slung (red arrows, from reference 1) - Photo-1, I added piping with 0.5mm brass wire - Photo-2. Then, temporary assembly is made - Photo-3, and Photo-4.
This weekend's achievement
2018.3.4. Wiring is added to the 37mm cannons slung with more slender 0.4mm brass wire - Photo-1, Photo-2.

This weekend's achievement
2018.5.5. After spraying Tamiya surface primer (light gray) very thinly, panel line accent color (black) is applied with fine brush - Photo-1, Photo-2. Then, using compressor, under surface light blue is sprayed (Tamiya XF-23), thinly to preserve panel line accent black color - Photo-3, Photo-4.
This weekend's achievement
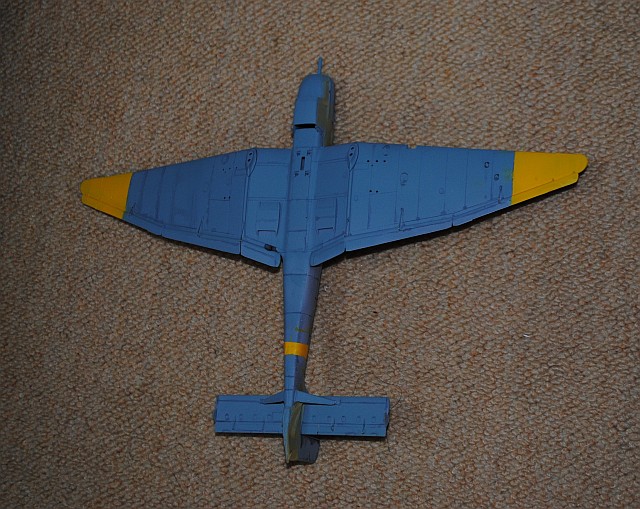
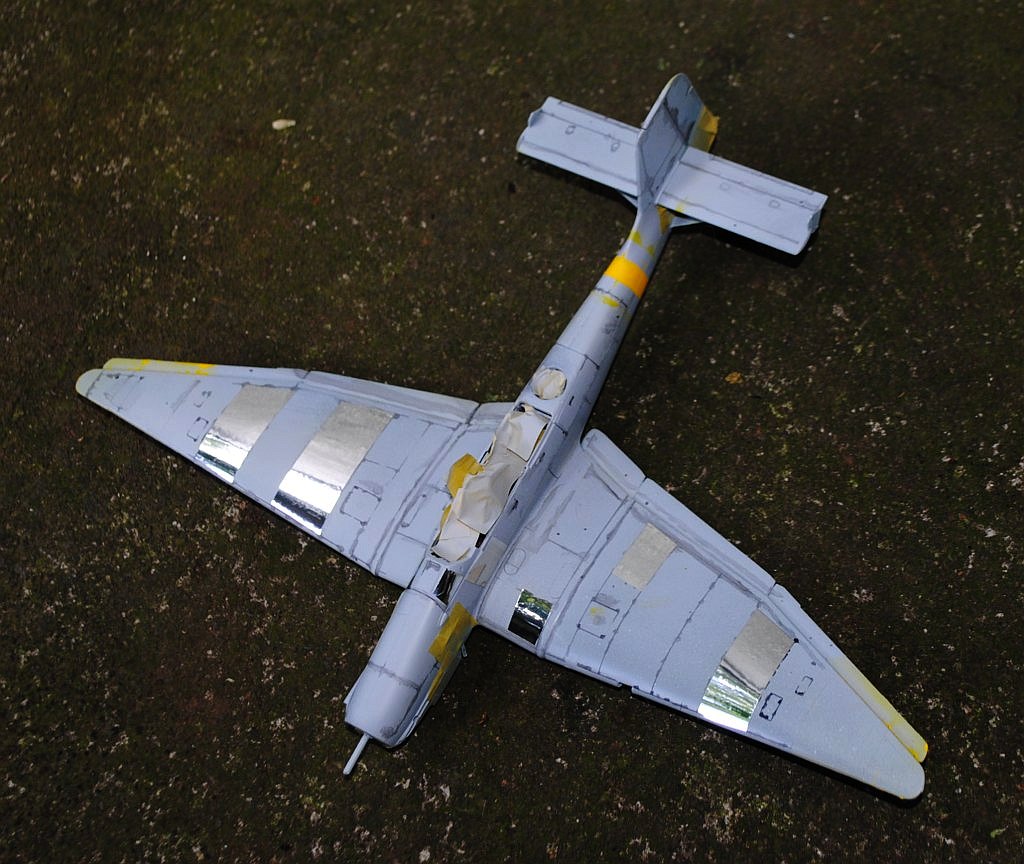
2018.7.1. Wing edges of lower surface and posterior fuselage belt was sprayed with flat yellow paint using compressor - after masking with newspaper and tape Photo-1, Photo-2, images after removing masking papers Photo-3, Photo-4.
This weekend's achievement
2018.7.8. Patches are put using thin Aluminum foil tape on the upper surface - Photo-1. Later I will exfoliate the sprayed upper surface color (dark green) to reproduce battle fatigue.
This weekend's achievement
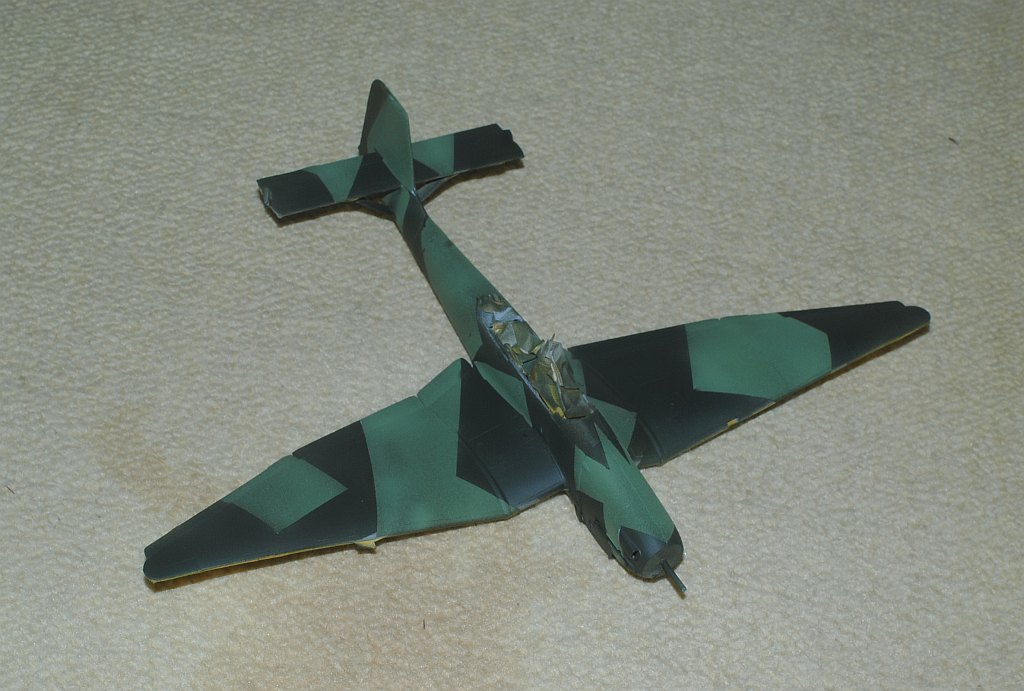
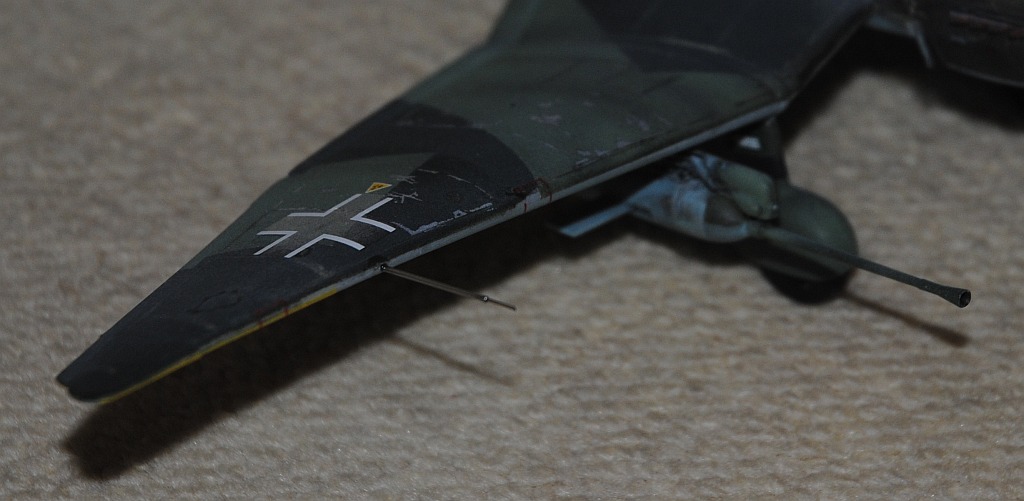
2018.8.20. After masking with tape - Photo-1 -, I spray dark green (Tamiya XF-61) for two tone splinter pattern (Luftwaffe-Splittermuster) for the upper surfaces - Photo-2.
2018.8.27. As dark green (Tamiya XF-61) was revealed too dark, I re-sprayed with olive drab (XF-62), but it was still too dark. So I finally sprayed XF-71 (cockpit color) -
Photo-1 -, Photo-2 -, and initial masking tape is removed - Photo-3 -. Then after this lighter green portions are covered with masking tape to protect the first step, the remaining parts are sprayed with dark green (Tamiya XF-61) - Photo-4. Not bad, but panel lines are lost because of overspraying..
This weekend's achievement
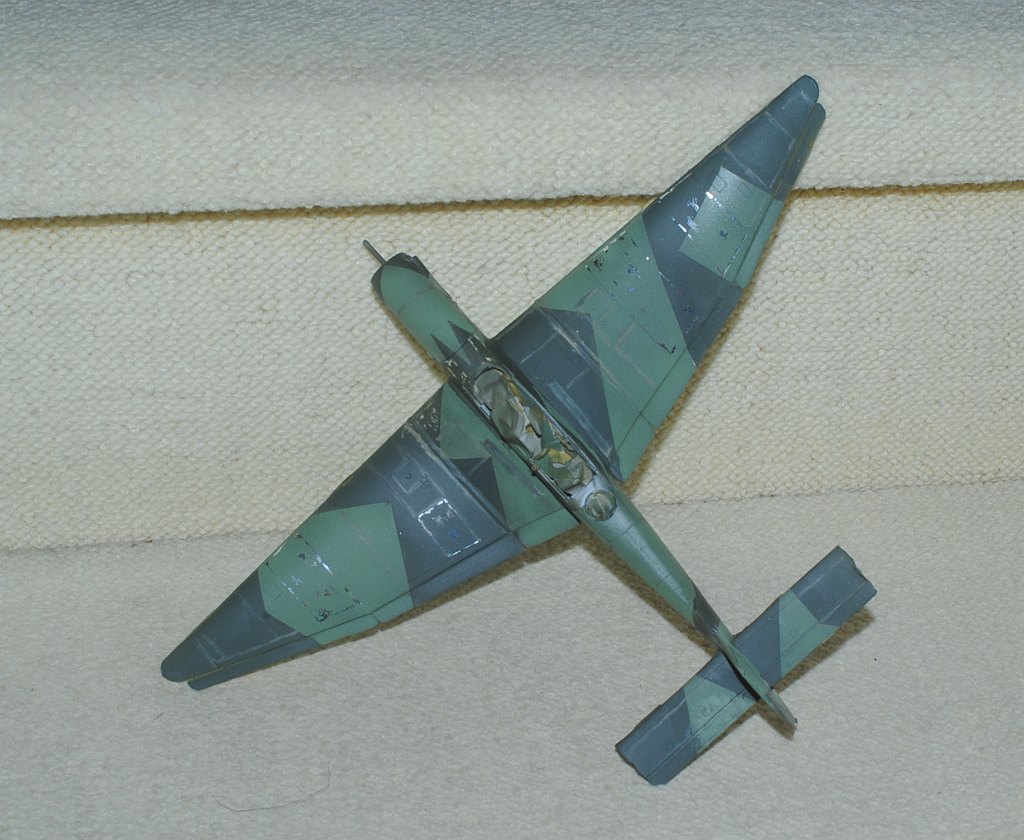
2018.9.2. Panel lines are accentuated with Tamiya weathering master and surface of the applied Aluminum foil tape was scraped -
Photo-1 -,
Photo-2 -,
Photo-3.
This weekend's achievement
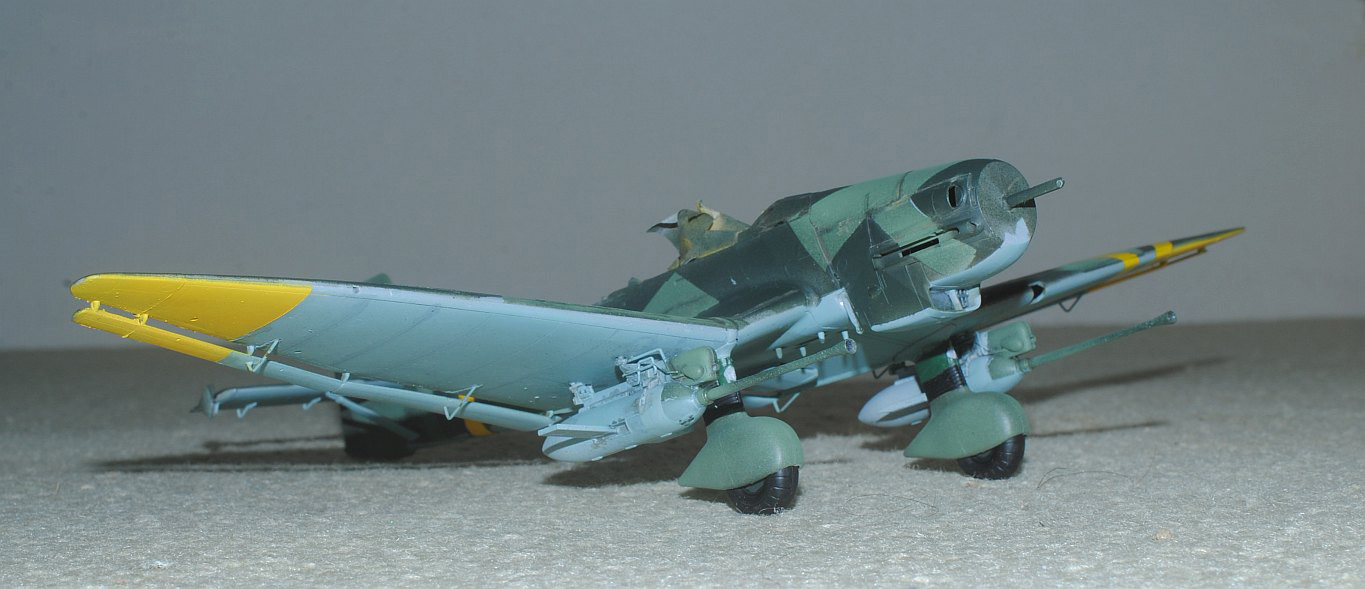
2018.9.30. Undercarriage spats and anti-tank 37 mm guns are cemented -
Photo-1 -,
Photo-2 -,
Photo-3. Canopy is still in preparation.
This weekend's achievement
2018.10.7. Engine exhaust is installed - Photo-1.

This weekend's achievement
2018.10.21. Propeller and spinner are assembled and painted - Photo-1.
This weekend's achievement
2018.11.4. Spiral pattern of spinner is finished using decal with retouching with brush -
Photo-1,
Photo-2,
Photo-3.
This weekend's achievement
2019.2.11. After masking with tape
- Photo-1,
canopy is sprayed with flat black (internal surface of frame)
- Photo-2,
and dark green (Tamiya XF-61 for external surface)
- Photo-3.

This weekend's achievement
2019.2.17. Anterior portion of windshield was cemented -
Photo-1,
Photo-2,
Photo-3,
Photo-4.
This weekend's achievement
2019.3.3. Windshield was cemented -
Photo-1,
Photo-2.
This weekend's achievement
2019.5.4. Footsteps and Counterweight glued to fuselage and to aileron, respectively -
Photo-1,
Photo-2.
2019.5.5. Decals applied
Photo-3 upper surface, and
Photo-4 lower surface.
This weekend's achievement
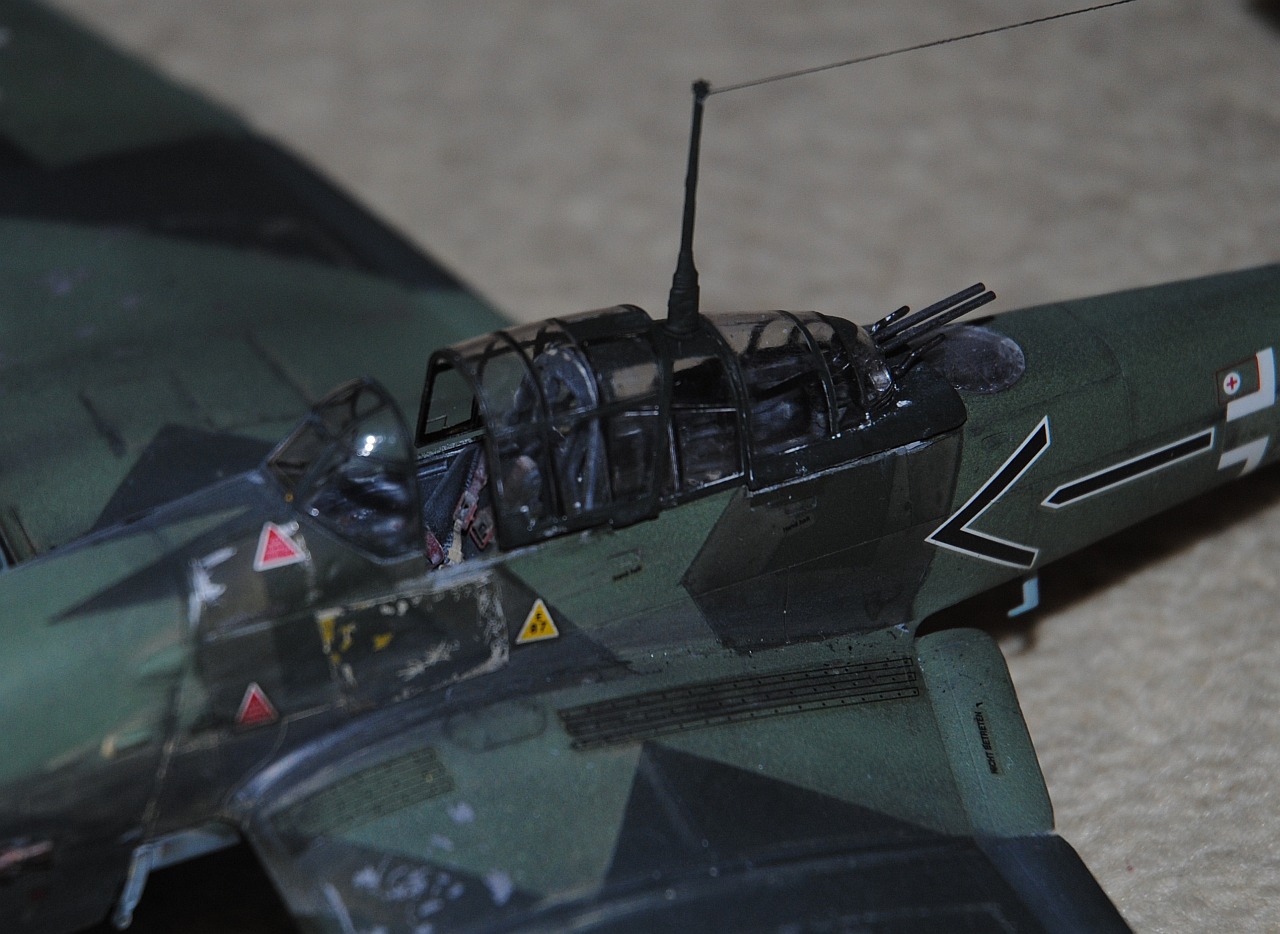
2019 (Reiwa 1).5.4. Masking tape over canopy, which was completed on February 11 2019, is removed after thin spraying of flat clear. I am always nervous when removing masking tape over canopy. This time it looks good, relieved -
Photo-1,
Photo-2,
Photo-3.
Weathering is rendered fairly intensely to depict the harsh environment of the Russian front in WWII.
This weekend's achievement
2019 (Reiwa 1).7.7. Radio mast with wire, tail wheel and landing lamp is installed. Antenna wire is, actually, from stocking which my wife discarded,,, hahaha. The thread is very thin and robust, indeed.
Photo-1,
Photo-2,
Photo-3,
Photo-4Seatbelts are from eduard (Czech company),
Photo-5.
This weekend's achievement
2019 (Reiwa 1).7.14. Spinner repainted and diorama background rendered -
Photo-1 Masking again with tape,
Photo-2 Sprayed with mat white,
and diorama rendering is beginning -
Photo-3.
2019 (Reiwa 1).7.14-15. Diorama is made, in which winter is coming to the Eastern Front with first snow of the season. Oberst Hans Ulrich Rudel's Stuka is still in summer camouflage, which would be sprayed in winter pattern soon -
Photo-1,
Photo-2,
Photo-3,
Photo-4,
Photo-5.
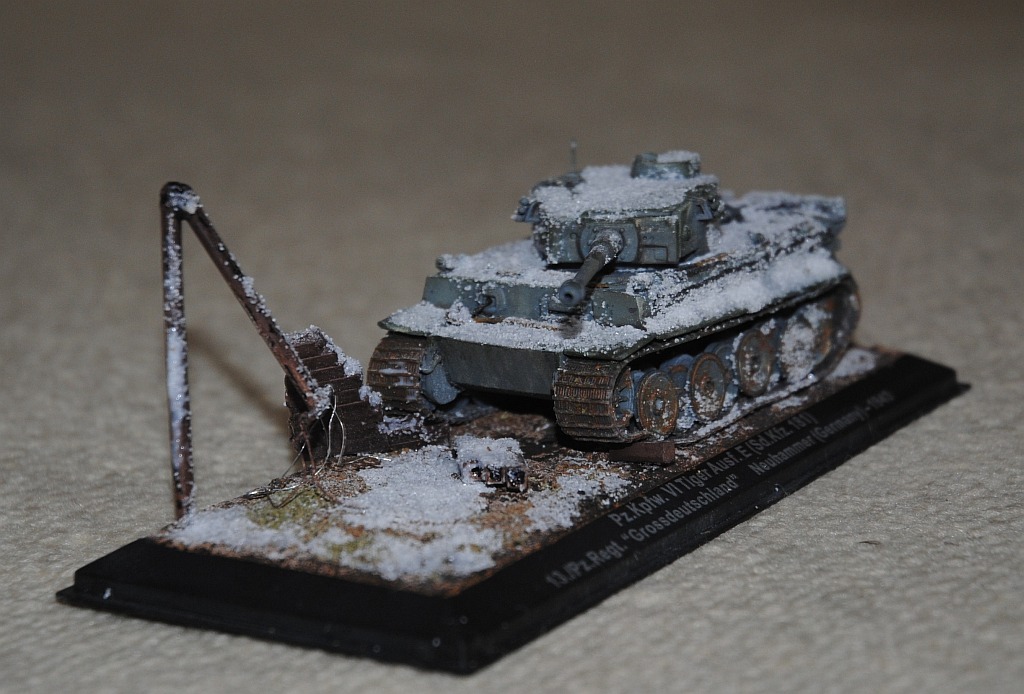
In the same setting, winter diorama is rendered to the 1/72 model of PzKpfw VI Tiger (Tiger I tank) facing eastern front, which is the member of the schwere Panzer-Kompanie Großdeutschland in Neuhammer, Germany, January 1943. BTW, the siege of Leningrad was continuing between September 1941 and January 1944, and the battle of Kursk (tank war) was during July and August 1943 - Photo-6,
Photo-7.
This weekend's achievement
This weekend's achievement
This weekend's achievement
This weekend's achievement
2019 (Reiwa 1).9.16. In the final stage, pitot tube is added. As usual, I used 21-gauge disposable injection needle with 0.5 mm white metal line, which is later painted with dark green (Tamiya XF-61) with brush -
Photo-1,
Photo-2,
This weekend's achievement
2019 (Reiwa 1).9.23. For dioarama, Kubelwagen type 82 (Tamiya 1/48) is now under construction -
Photo-1,
Photo-2.
This weekend's achievement
2019 (Reiwa 1).10.14. Kubelwagen type 82 (Tamiya 1/48) is covered with snow fall for diorama of Ju87 G-2.
[Before snow coverage]
Photo-1 Masking for wiper-covered area of the front glass,
Photo-2,
[After snow coverage]
Photo-3,
Photo-4,
Photo-5,
2019 (Reiwa 1).10.21. Personnels of Ju87 G-2 are painted in association with German Kubelwagen type 82 (Tamiya, 1/48).
Photo-1,
Photo-2,
Photo-3,
Photo-4,
This weekend's achievement
References:
1. Junkers Ju87 STUKA. Famous Airplanes of the World, Vol 11, Bunrindo, Tokyo, 1998 (ISBN10-4893190083, ISBN-13: 978-4893190086).
2. Luftwaffe in World War II - Aero Pictorials 1. Aero Publishers, Inc., 1968.
3. Hans-Ulrich Rudel: Trotzdem [Nevertheless] (in German). Göttingen, Germany: Schültz. 1966 (I used rough Japanese translation version: ISBN-10: 4059011541, ISBN-13: 978-4059011545).
Back to "Scale Model Hobby" Index Page
Back to previous Home Page at AOL (Till October 31 2008)
Back to previous Home Page at geocities.jp web host (Till March 31 2019)
Back to New Home Page (Translocated Sakura server)
version 1.00 2019/11/25
Please send your comments to DrHASEGAWA@aol.com